Why Intel NUC 12 pro can build on VMware ESXi 8.0 home lab?
The Intel NUC 12 Pro is a powerful and compact computer that is well-suited for running virtual machines, and VMware ESXi 8.0 is a virtualization platform that is designed to run on a variety of hardware platforms, including the NUC 12 Pro. ESXi 8.0 is a popular choice for building home labs because it allows users to create and manage multiple virtual machines on a single physical machine.
The NUC 12 Pro’s hardware specifications make it an ideal platform for running ESXi 8.0. It features a powerful 12th Gen Intel Core processor, up to 64GB of RAM, and up to 2TB of storage, which provides ample resources for running multiple virtual machines. Additionally, the NUC 12 Pro supports Thunderbolt 4 connectivity, which allows for fast data transfer between the NUC 12 Pro and other devices.
Overall, the combination of the NUC 12 Pro’s hardware specifications and ESXi 8.0’s virtualization capabilities make it a great choice for building a VMware ESXi 8.0 home lab.
What are some common use cases for running a home lab with VMware ESXi 8.0?
Running a home lab with VMware ESXi 8.0 can be useful for a variety of purposes, including:
Learning and testing: A home lab can provide an environment for learning and testing new technologies without the risk of affecting production systems. This can be particularly useful for IT professionals who want to gain hands-on experience with virtualization, networking, and other technologies.
Developing and testing software: A home lab can be used by software developers to test their applications in different environments, without having to rely on production systems. This can help identify and fix issues before deploying the software to production environments.
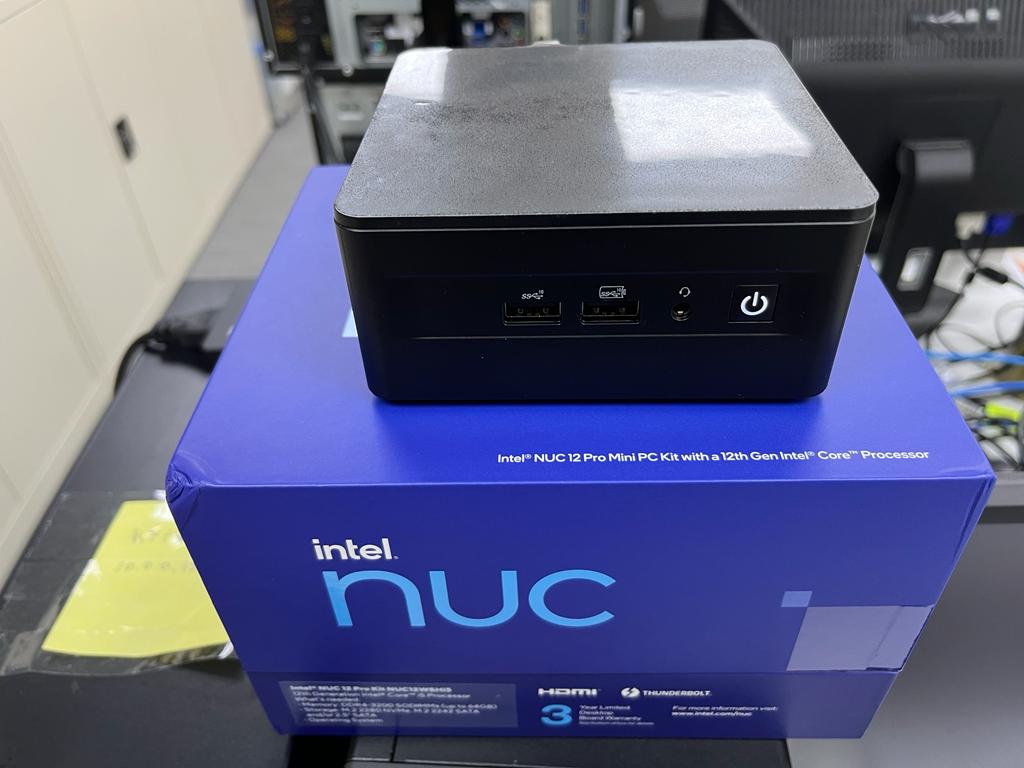
Here is Intel NUC 12 pro System specs
Model: NUC12WSHi5
Processor type: 12th Gen Intel(R) Core(TM) i5-1240P
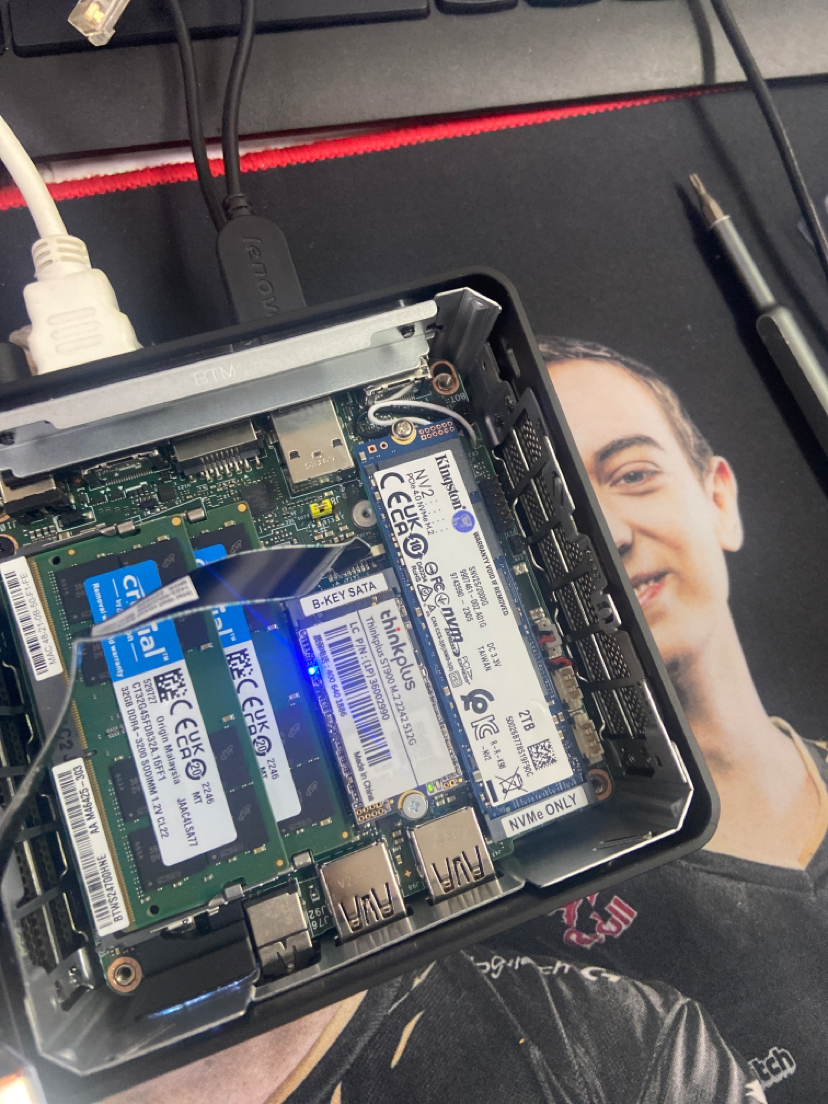
Memory: 64 GB
Storage:
1. 2.5″ 256GB SSD (Install ESXi 8.0)
2. M.2 2242 512 SSD (vSAN Cache)
3. M.2 2280 2TB NVMe (vSAN Storage)
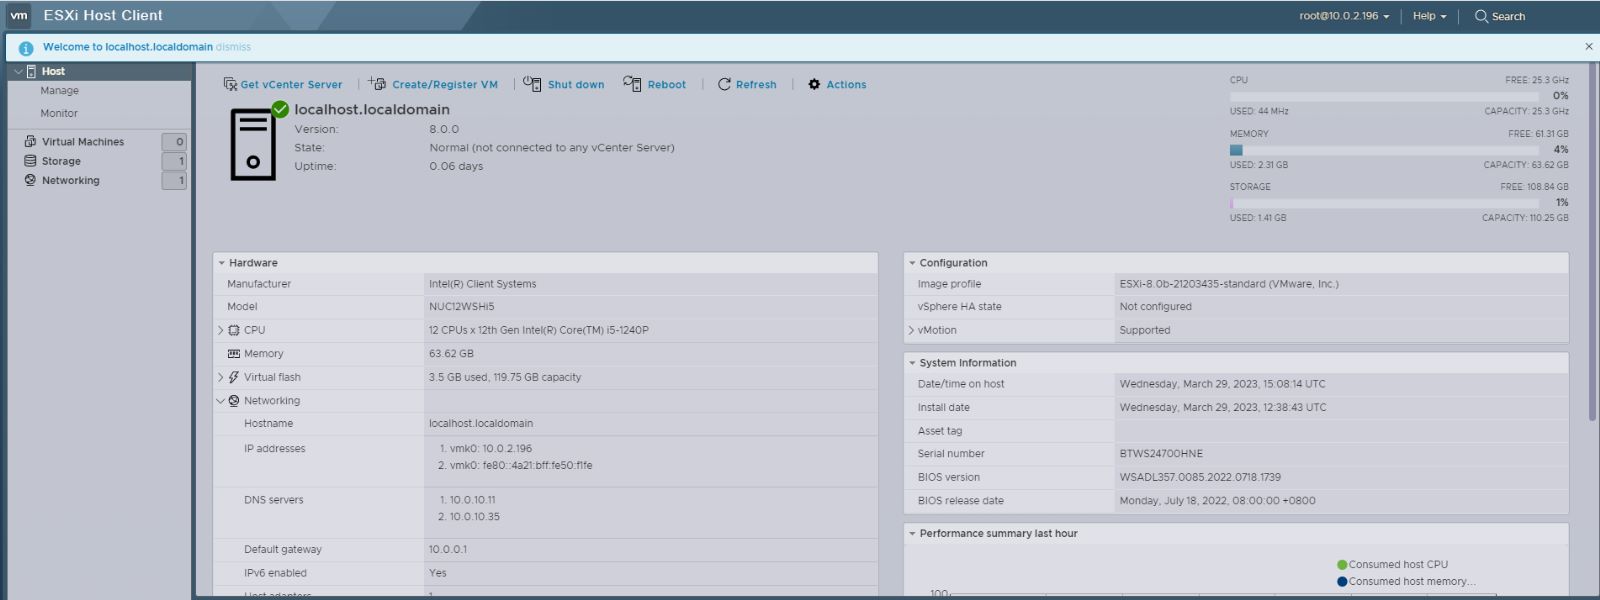
VMware vSphere version: ESXi-8.0b-21203435-standard (VMware, Inc.)
How to install VMware vSphere 8.0 to Intel NUC 12
Here are the steps to install ESXi 8.0 on an Intel NUC 12 Pro:
- Download the ESXi 8.0 ISO from the VMware website.
- Create a bootable USB drive with the ESXi 8.0 installer. You can use a tool like Rufus to create the bootable USB drive.
- Insert the bootable USB drive into the Intel NUC 12 Pro and power it on.
- Press the F2 key to enter the BIOS settings.
- In the BIOS settings, navigate to the Boot tab and change the boot order so that the USB drive is first in the boot order.
- Save the changes and exit the BIOS settings.
The Intel NUC 12 Pro should now boot from the USB drive and display the ESXi installer.
Please follow the below instructions to install ESXi 8.0 on the Intel NUC 12 Pro.
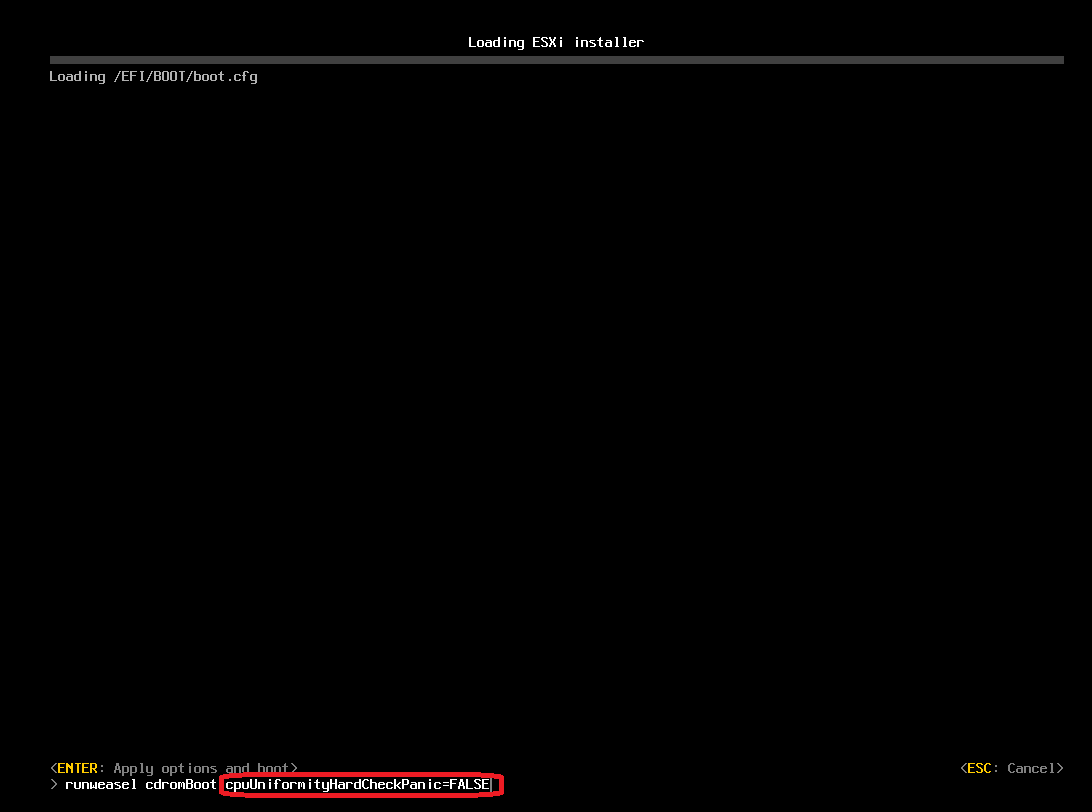
During the bootup of the ESXi installer, you will see an option to to append additional ESXi kernel boot settings.
Press SHIFT+O and append the following kernel option
“cpuUniformityHardCheckPanic=FALSE” to the command line and the press enter to continue the boot process.
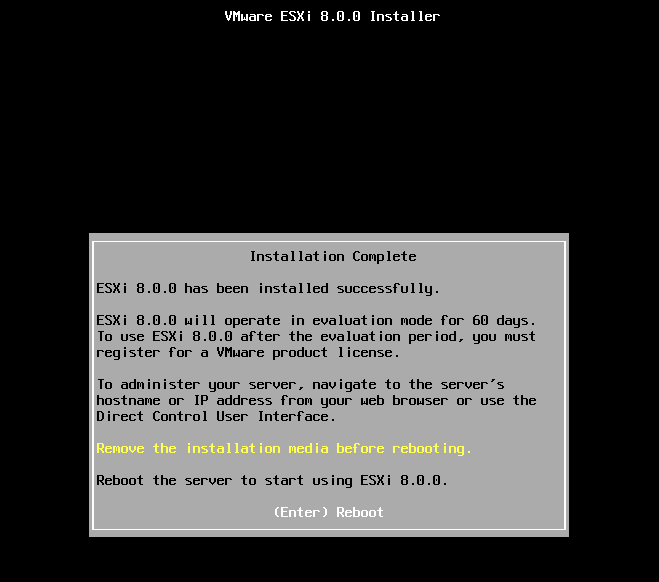
Install ESXi by following the install wizard and once you are prompted to reboot, do not reboot yet. We need to add the kernel option again so that ESXi can successfully boot after the installation.
Switch into the ESXi shell by press “ALT+F1″ and login using root and blank password as ESXi has not gone through full reboot and is not using the configured password.

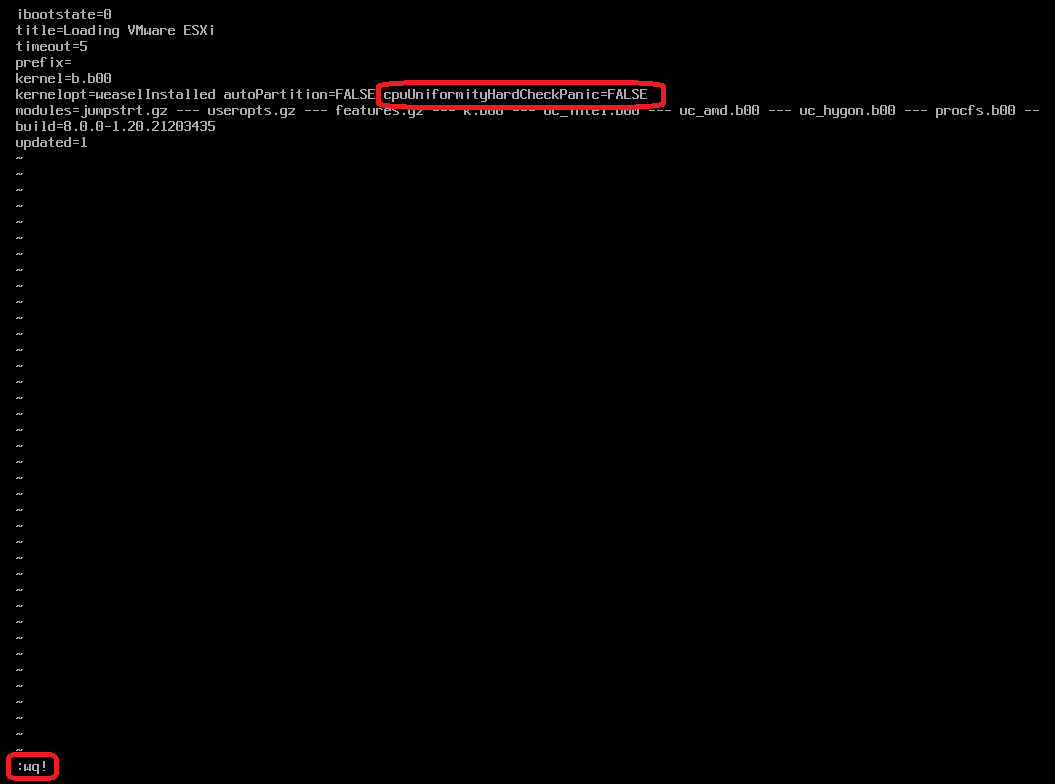
Save your changes and then change back to the reboot prompt by press “ALT+F2″ and then reboot.
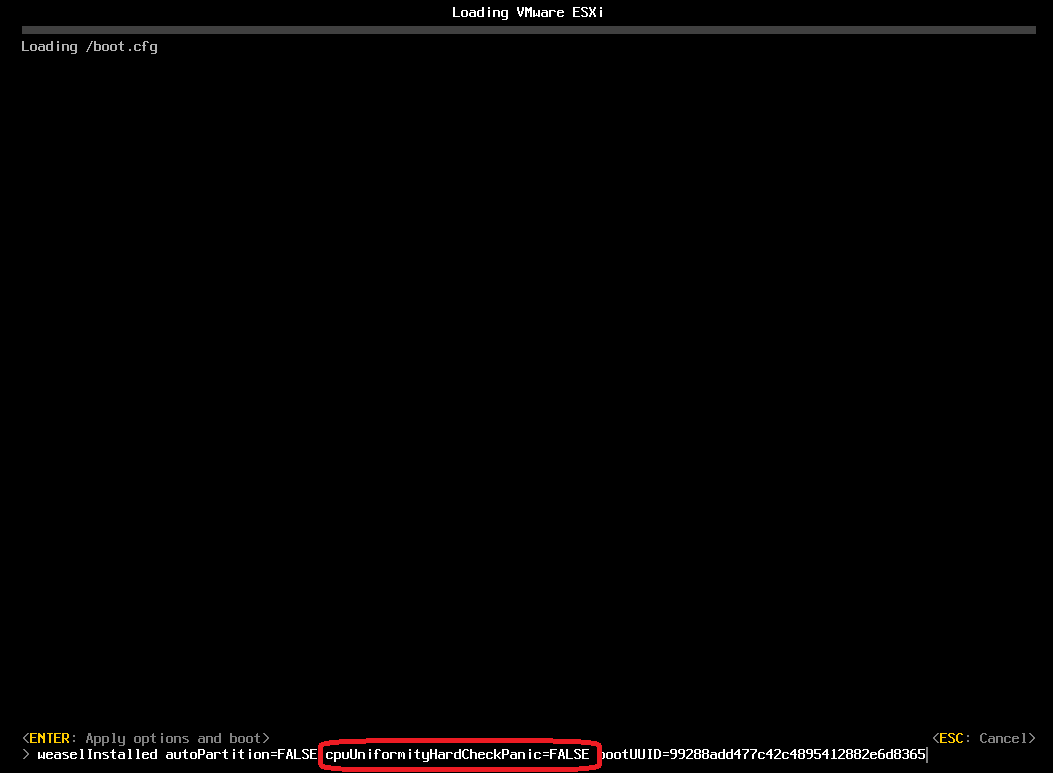
After reboot, the VMware vSphere 8, Press “ALT+F1” to check the below kernel option cpuUniformityHardCheckPanic=FALSE and then “ESC” continue to run the Server
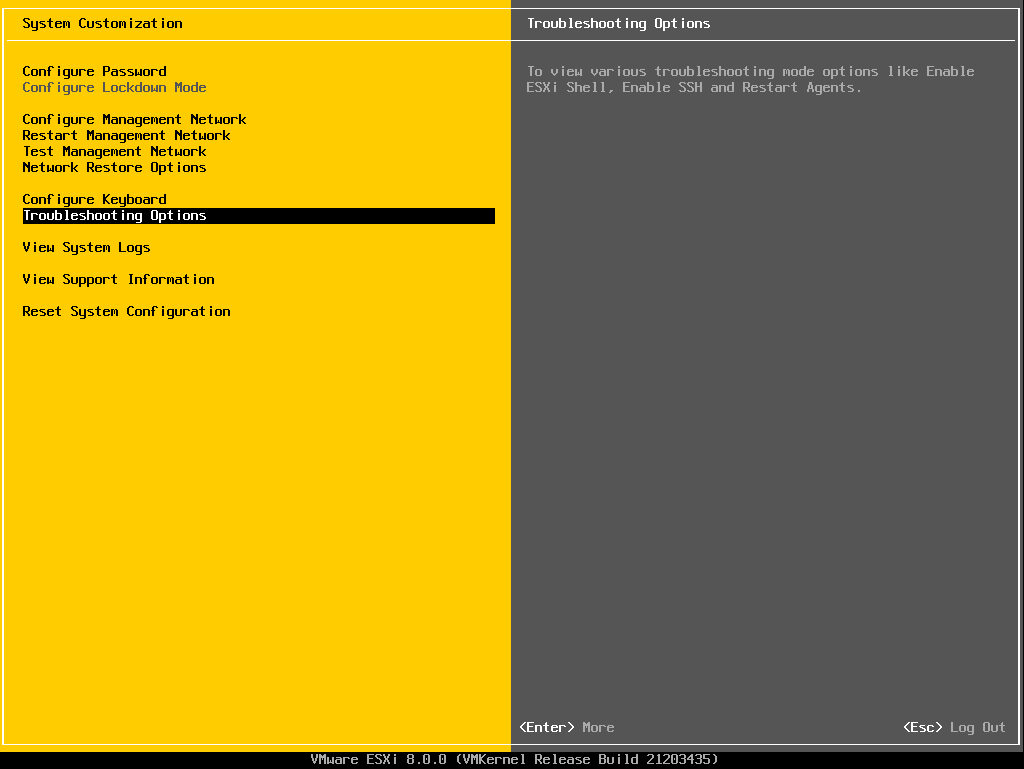
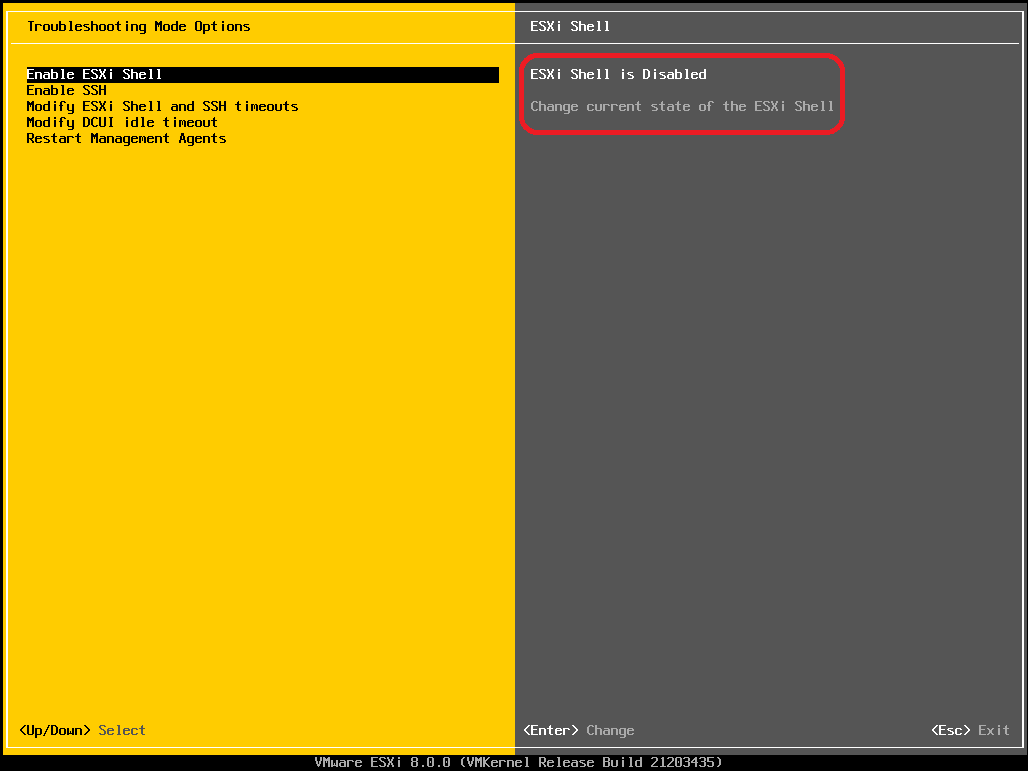
If you want to permanently configure the ESXi kernel boot setting, in case of updates/upgrades in the future, we can set the kernel setting using ESXCLI. Press”F2” System Customization, Troubleshooting Options, “Enable ESXi Shell“

Switch into the ESXi shell by press “ALT+F1” and login with root and the password you had configured during installation. Now run the following ESXCLI command to configure the kernel option:
esxcli system settings kernel set -s cpuUniformityHardCheckPanic -v FALSE
esxcli system settings kernel list -o cpuUniformityHardCheckPanic
then press “ALT-F2” logoff.

Finally, deactivate the ESXi shell.
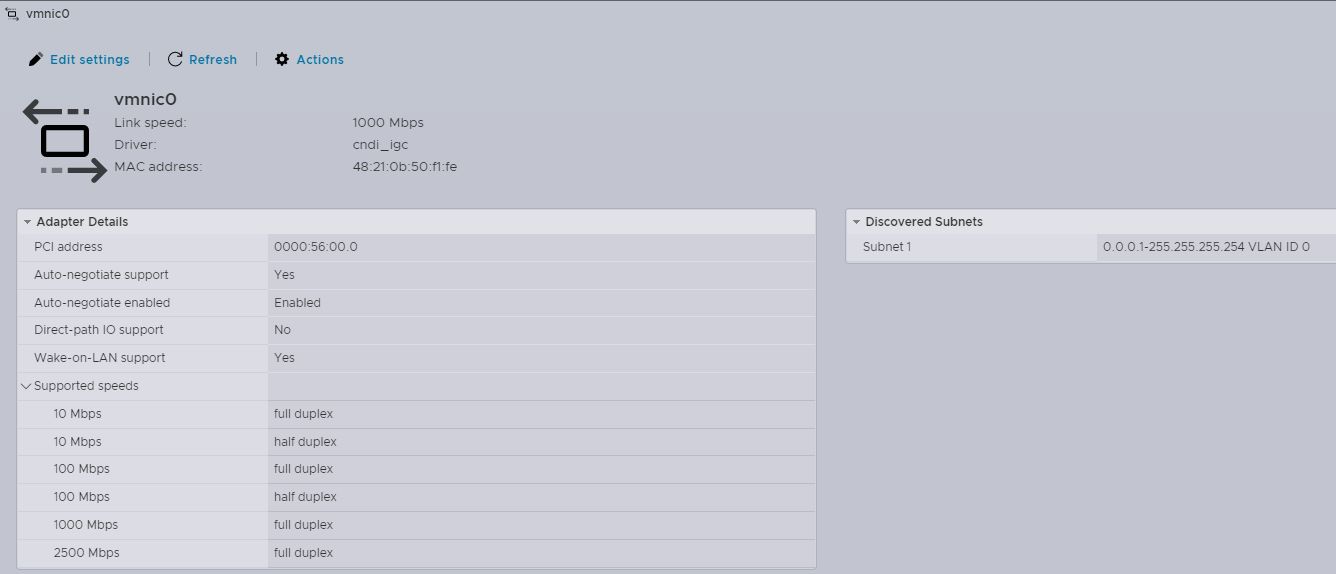
VMware vSphere 8.0